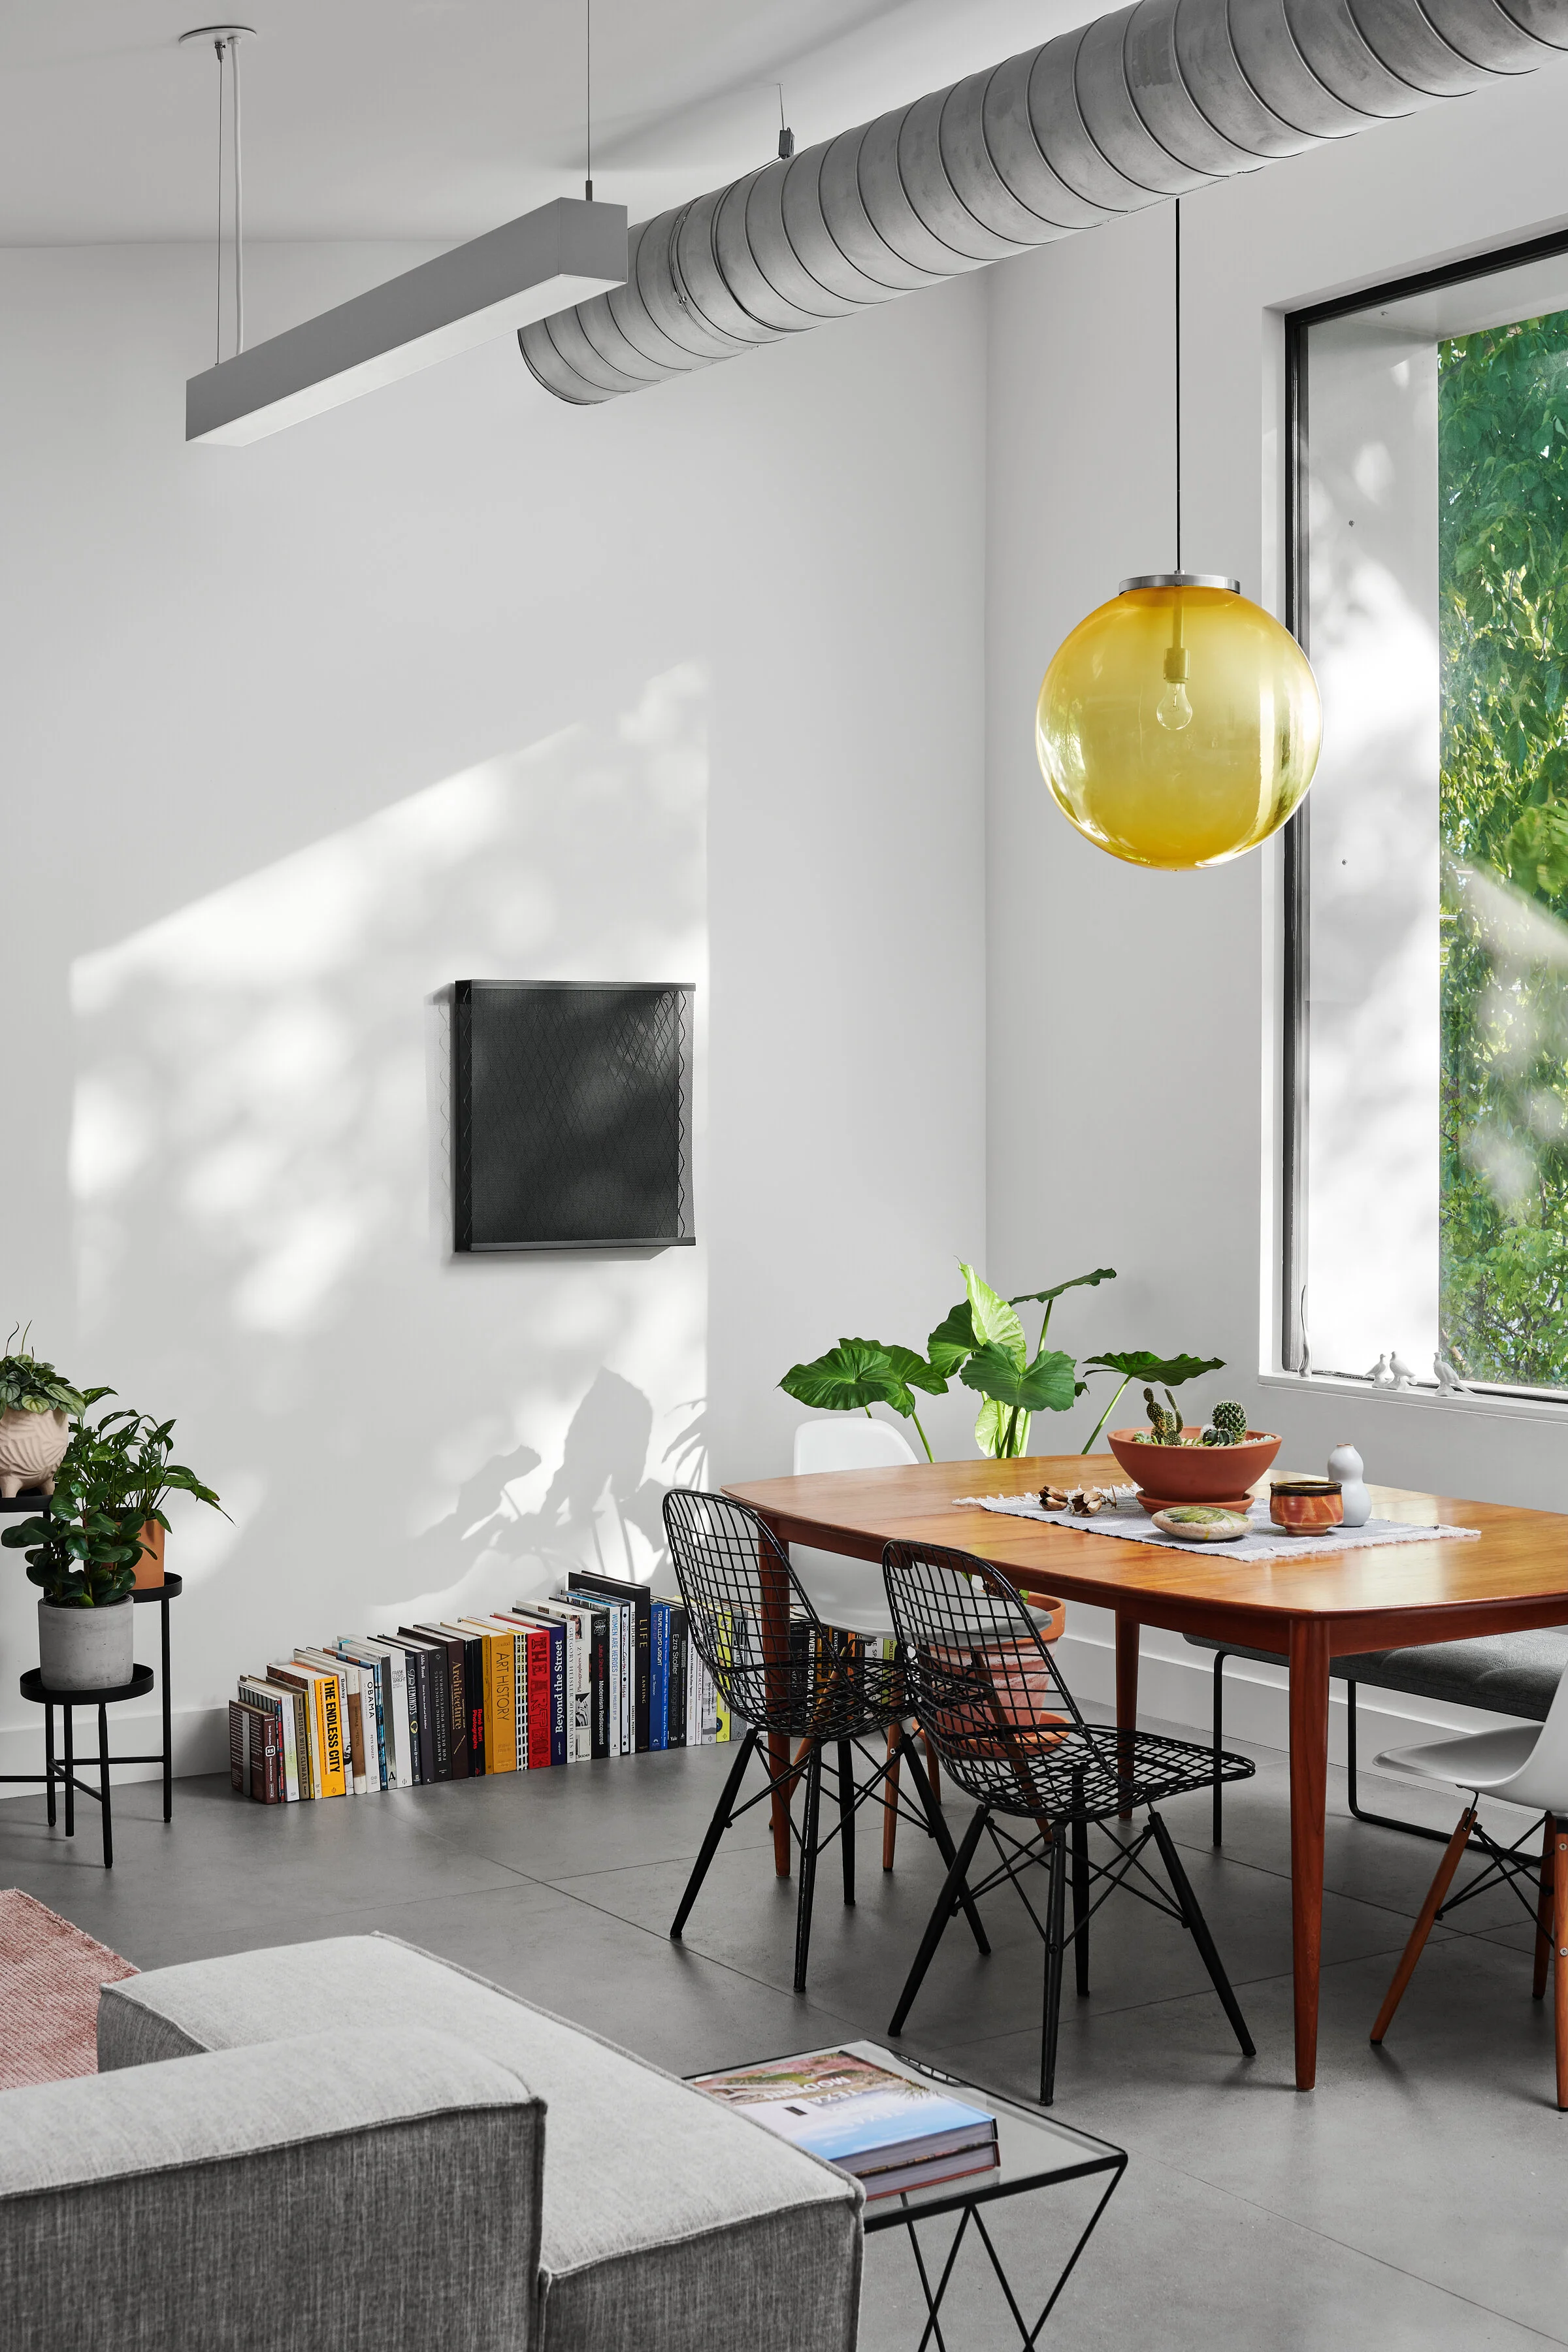
Whew. Well, kudos to anyone who made it all the way through part two of this video series, where I walk through the photography and post-processing of the image below. The original plan was to share the editing process in real-time, but I quickly recognized how boring that would be to sit through as I fumbled my way through describing my every move as I made them (turns out that’s not so easy). So I hope to have found a happy medium with this final result where I speed up the screen recording and talk over top of it.
Post-production has always had a huge impact on the final outcome of a photograph. Whether it be dodging, burning and other techniques in the darkroom or complex compositing that some of us employ digitally today. There are endless debates out there on how much is too much, and I’ll leave that for another discussion. The ability to manipulate color, tonality and light is limitless with todays technology and many of us utilize these tools to create the images that we think are most fitting for a clients needs and show the true essence of their design intent.
There are a few noteworthy things about how I went about shooting this space. First of all, by controlling the amount of natural light that is allowed into the frame by flagging (blocking) off the two smaller windows to the cameras left, we can already achieve a very nice shaping of light within the space. In the ambient frame shown below, we can begin to see how that natural light fills the space, but also begin to see the problems that arise from such a large window which introduces a variety of color casts from the trees and sky outside on to the walls and other surfaces. We are also not able to define both the interior and exterior’s exposures correctly in one single shot as our eyes are able to perceive, which is where using strobes becomes such a powerful tool. As you can see in the flash frame below, this already gets us 80% to the final result. By utilizing Photoshop to merge these and a few other frames, we are able to seamlessly blend exposures to come up with a crisp, natural looking result that is true to the spaces finishes and likeness.
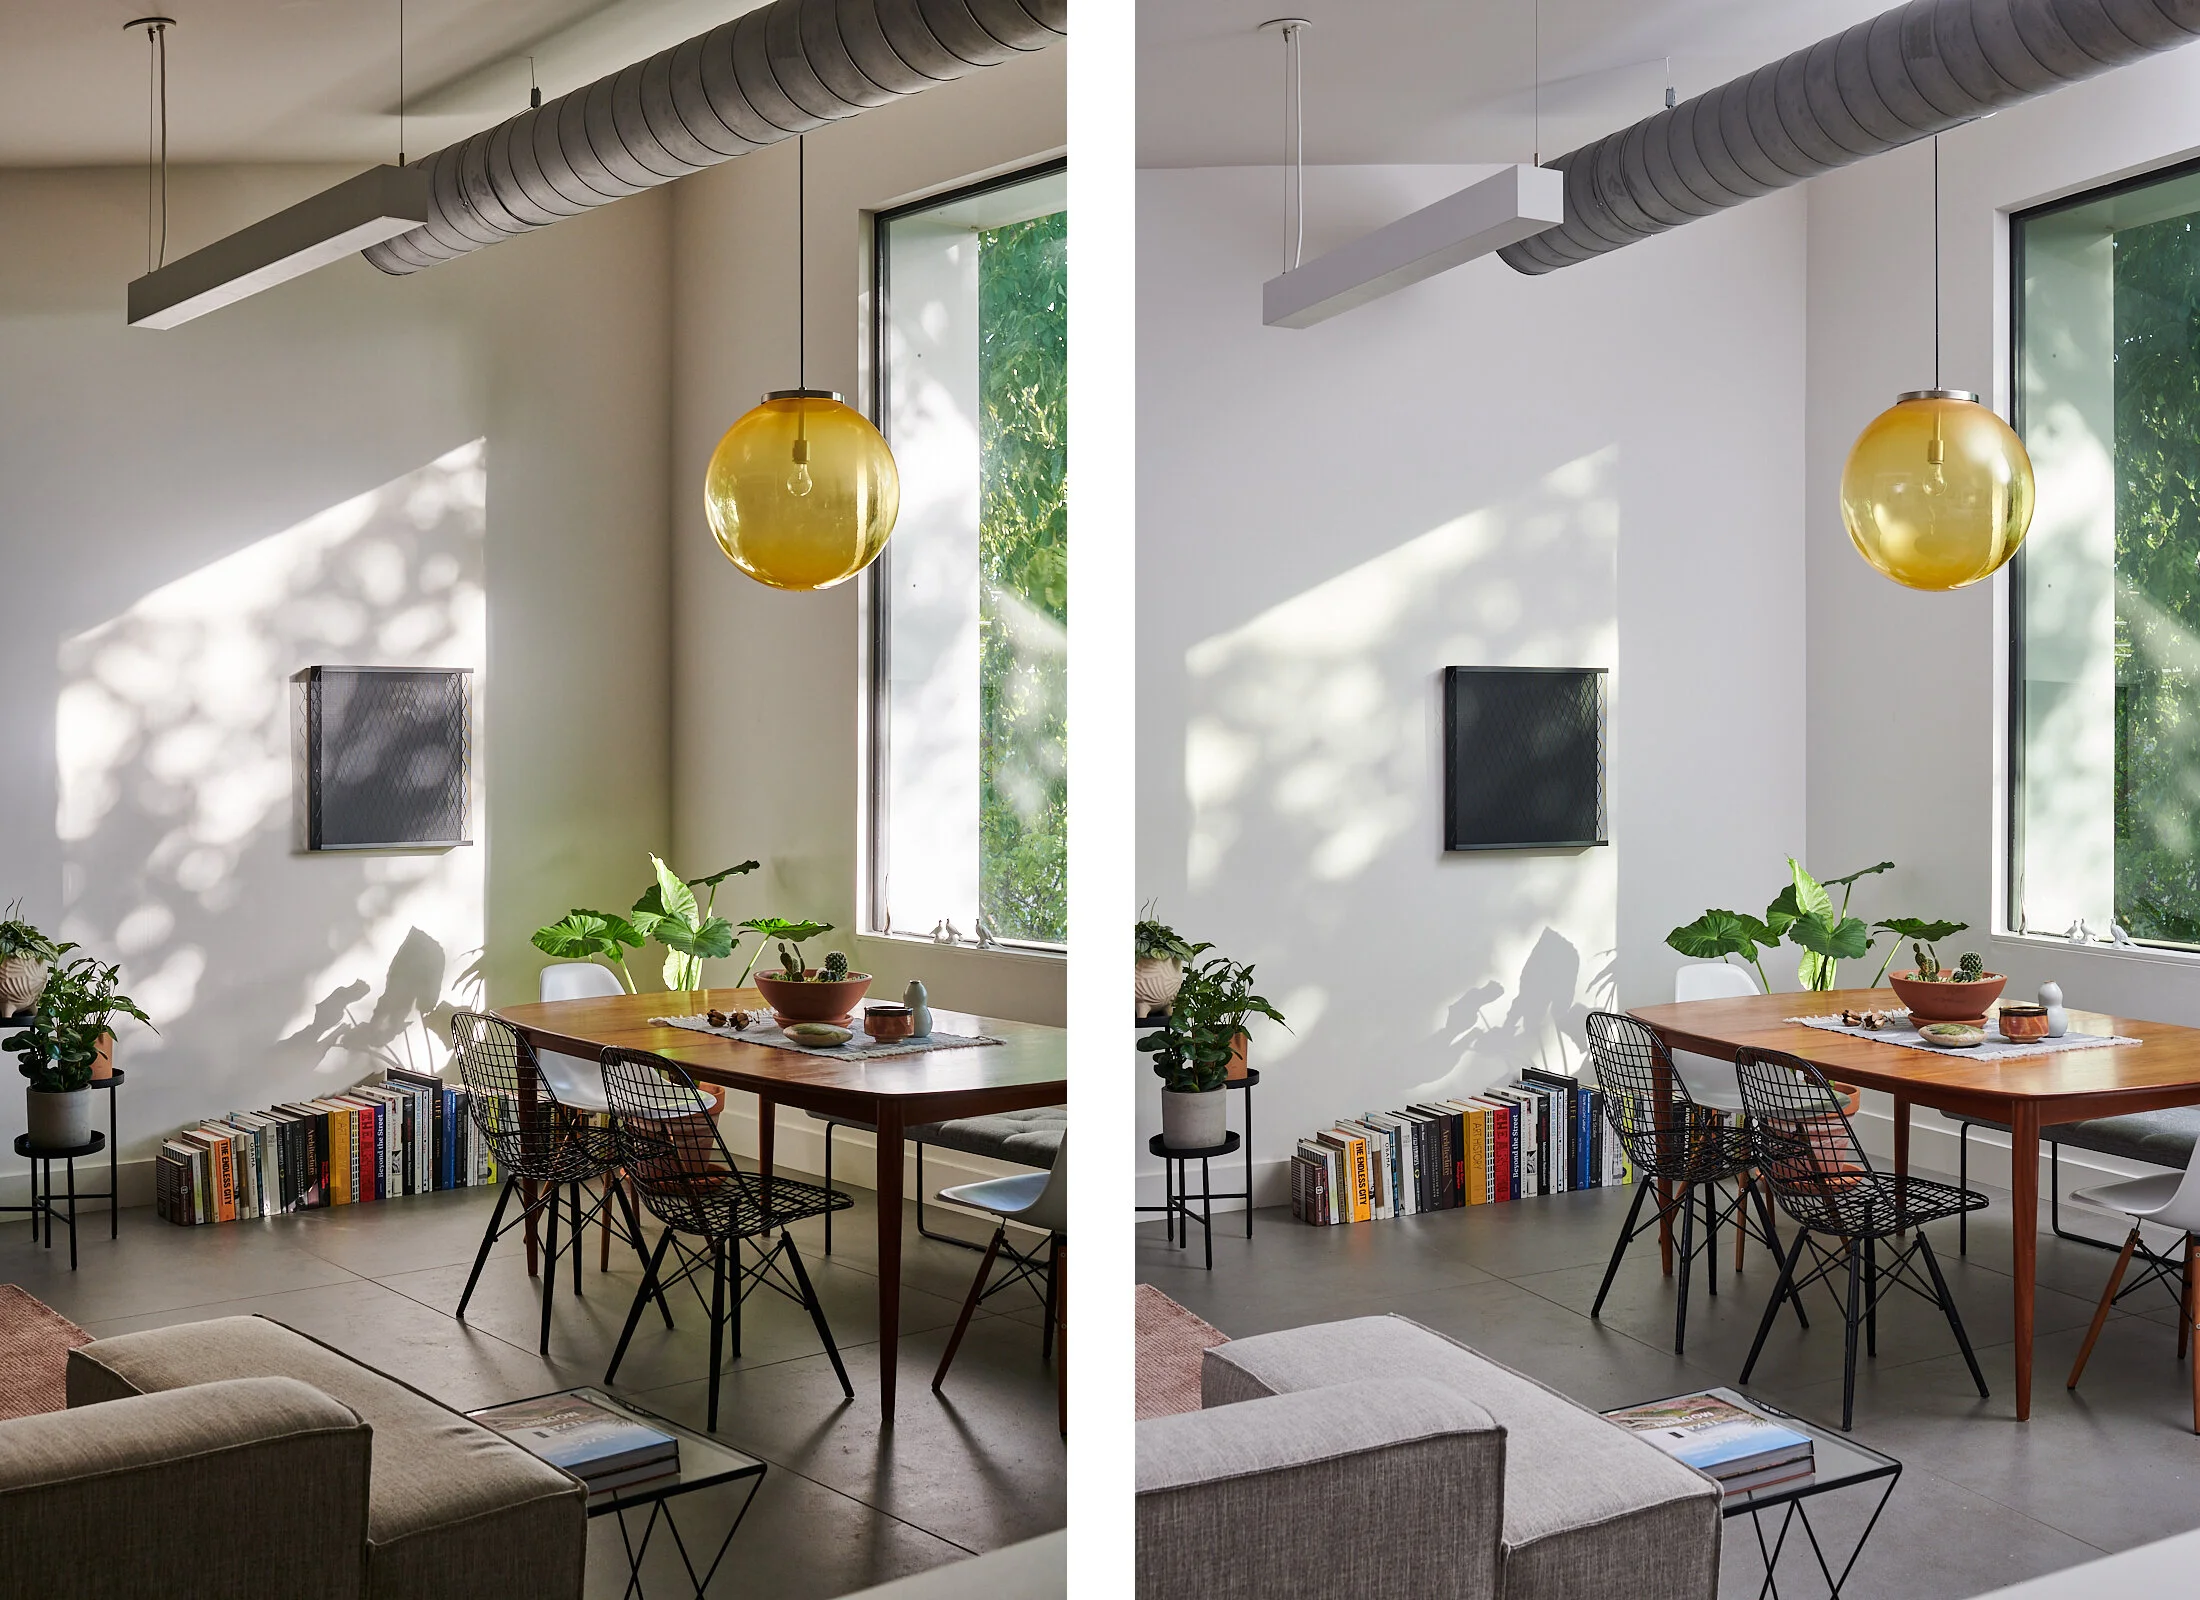
On the right, an ambient frame of the space using only natural light. Notice the strong colors being cast onto the surfaces from the foliage inside and out and the blues of the sky.
On the left, a single exposure with flash allows us to balance the interior and exterior much better, while being true to the material pallet inside of the space.
Once I found the balance I was looking for in the flash and ambient exposures, I moved the files into the computer where I dove into the RAW conversion, which involves basic adjustments to contrast, white balance and clarity and from there, send the files into Photoshop for compositing. This process for this image is fairly simple (all things considered) as it frequently is with interior vignettes because we are not trying to capture the entirety of a space which can often involve many more challenges such as those introduced when trying to light a much larger area. There are a few tools that you’ll see I lean on heavily when doing work in Photoshop, and those include layer masks, the pen tool, adjustment layers and cloning/healing. Instead of going deep into the details of those here, I will begin to think about separate videos I can create in the future that walk through my use of them more thoroughly.
With time, you begin to develop a general set of methods that you use to put your images together and will be able to always have these in the back of your mind as you’re shooting a project to ensure that you’ve got everything you need to come to the desired result.